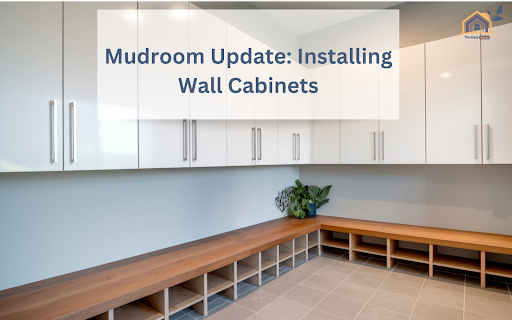
Updating your mudroom with wall cabinets is a simple way to improve storage while keeping the space clean and functional. You can tackle this project quickly with proper planning and a step-by-step approach.
Let’s dive into the process of creating a practical and stylish mudroom.
Why Choose Wall Cabinets for Your Mudroom?
Wall cabinets are perfect for utilizing vertical space, especially in compact areas like mudrooms. They offer storage for shoes, coats, and supplies, keeping everything neat and off the floor.
Additionally, wall cabinets can enhance the appearance of your mudroom by creating a streamlined and polished look. With various styles available, it’s easy to find cabinets that suit your space and needs.
Benefits of Wall Cabinets
- Maximize storage without taking up floor space.
- Keep items organized and hidden.
- Improve the room’s overall aesthetic.
Adding wall cabinets to your mudroom is functional and visually appealing, making them a smart choice for busy households.
Materials and Tools: What You’ll Need
Gathering the right tools and materials beforehand will help the project run smoothly.
Essential Tools:
- Measuring tape
- Stud finder
- Drill and screws
- Level
- Wall anchors (if studs are unavailable)
Materials:
- Wall cabinets (pre-measured to fit your space)
Product Suggestion: The ClosetMaid Wall Cabinet is a sturdy option with adjustable shelves, ideal for a mudroom.
Having everything ready ensures fewer interruptions during the installation process.
Step 1: Planning and Preparation
The first step is planning your mudroom layout. Measure your available wall space carefully and decide the number of needed cabinets.
Marking the Wall
Using a stud finder, locate the studs on your wall and mark them with a pencil. Studs provide the necessary support for heavier cabinets. If your chosen location lacks studs, wall anchors can be an alternative.
Plan the height of the cabinets based on accessibility. Keep them high enough to avoid cluttering the floor but within easy reach for daily use.
Step 2: Installing the Mounting Brackets
The mounting brackets are the foundation for your cabinets. Secure these brackets to the wall, ensuring they align with the studs. If you’re using wall anchors, follow the manufacturer’s instructions for the best results.
Using a Level
Always use a level to confirm the brackets are straight. Uneven brackets can result in poorly aligned cabinets, affecting function and appearance.
Transitioning from preparation to installation, you’ll be ready to attach the wall cabinets.
Step 3: Hanging Wall Cabinets
Carefully lift the first cabinet into place, aligning it with the mounting brackets. Secure the cabinet to the wall using screws. Start with the top screws, then work your way down.
Aligning Cabinets Side by Side
If you’re installing multiple cabinets, ensure they are aligned evenly. Use clamps to hold adjacent cabinets together temporarily while securing them. Check with a level before tightening all screws.
Take your time during this step to achieve a professional, polished look. Proper alignment is vital to both functionality and style.
Step 4: Finishing Touches
After securing the cabinets, focus on the small details to complete the project. Fill gaps between the cabinets and wall with caulk for a seamless finish.
Adding Hardware
Install cabinet handles or knobs to make opening and closing easy. Select hardware that complements the overall design of your mudroom. A few thoughtful additions can significantly enhance the look and usability of your cabinets.
Common Challenges and Simple Fixes
DIY projects can have hurdles, but most are easy to address with preparation.
- Uneven Walls: Use shims to align the cabinets correctly during installation.
- No Studs Available: Heavy-duty wall anchors provide extra support when studs aren’t an option.
- Alignment Issues: Loosen screws slightly and adjust the cabinet’s position before tightening them again.
By tackling these challenges, you’ll ensure a durable and professional result.
The Finished Mudroom
Once the cabinets are installed, you’ll notice a cleaner and more organized space. Wall cabinets provide ample storage for everyday items, making your mudroom functional and clutter-free.
The New Look
Adding wall cabinets enhances your mudroom’s appearance, creating a neat and welcoming environment. You’ll appreciate how simple updates can make a big difference in style and usability.
Customizing Your Cabinets
Add a personal touch to make your new cabinets uniquely yours. Paint them to match your mudroom’s color scheme or label shelves for more accessible organization.
Tips for Extra Functionality
- Install hooks or baskets inside cabinets for smaller items.
- Use adjustable shelves to customize storage for your needs.
Customizing your wall cabinets ensures they meet your family’s needs while reflecting your style.
Final Thoughts
Installing wall cabinets is a straightforward way to improve your mudroom’s storage and appearance. With careful planning and step-by-step execution, you can tackle this project successfully. Don’t hesitate to add personal touches to make your mudroom functional and inviting. Enjoy the satisfaction of a well-organized and visually appealing space!
FAQs
What is a cabinet in a wall called?
A cabinet in a wall is often referred to as a wall cabinet or an overhead cabinet.
What are wall cupboards called?
Wall cupboards are also called wall-mounted or upper cabinets, commonly used in kitchens and mudrooms.
What is a standard wall cabinet size?
Standard wall cabinet sizes are typically 12-24 inches deep, 12-42 inches high, and 9-48 inches wide.


